Friday, December 13, 2013

Garlic Kale Chips ~ Raw, Vegan, Gluten Free


All hail kale! Yes, I say this over and over again. Please excuse my repeat :)  It's just that kale is so so good for us, it is incredibly versatile and it is really a beautiful plant.  Easy to grow, great in many climates (especially in cold climates where the flavor is enhanced and sweetened) and it will clean, clean, clean your body.  With that said, let's all take a moment to hail the kale!  How can we do this?  How about making kale chips that will blow your expectations of amazing snack foods outta the water?!  Here we go:
This is what you are going to need: dehydrator. If you don't have one, I highly suggest investing in one. In the mean time, set your oven to its lowest setting, crack the door and leave it open for venting.  If you are using an oven, the cooking time will be very quick, about 1 hour or less so keep on eye on them.

Ingredients:
  • 1 large bunch of curly green kale, stemmed, chopped  (about 8 cups)
  • 1 cup raw cashews, soaked 2-4 hours, rinsed
  • 3 Tbsp. fresh lemon juice
  • 1/4 cup nutritional yeast
  • 8-10 cloves garlic, crushed, roughly chopped
  • 1 tsp. sea salt
  • 4 tsp. granulated garlic, optional for extra intense garlic flavor
  • 1/8 cup filtered water, use as need for consistency
Method:
  1. The easiest way to de-stem and wash kale is as follows: Hold the kale leaf by the stem and place your hand around the stem then run upward along the stem to remove the leaf.  Tear or chop your kale and add to a large bowl of filtered water. Let soak for about ten minutes, swish and then drain.  Rinse again and your leaves should be good to go.  No need to dry the leaves. They can be a little wet. 
  2. Place all ingredients, except kale, water, and granulated garlic, in a food processer fitted with the "S-type" blade. Process until smooth.  Scape down the sides and with the processor running, slowly add the water.  We want a consistency similar to hummus or tahini.
  3. Toss your kale in the garlic mixture.  Massage it into the kale gently.  Then lay your seasoned kale pieces on your dehydrator sheets.  Sprinkle with the granulated garlic.
  4. Dehydrate 8 hours.  Best to do this in the morning and let them dehydrate during the day! They smell so incredibly good the scent of garlic will wake you up if you dehydrate overnight!  Enjoy!
These Garlic Kale Chips pair really well with a collard wrap for lunch!  I ate mine with a quick Mexi Collard Wrap filled with fresh veggies, black beans, and avocado mash.  Yum yum!


Want more kale chip recipes?  Coming up next, Ginger Soy Kale Chips:


Thursday, December 12, 2013

Mexican Chop Salad with Cilantro Vinaigrette


Living in the Pacific Northwest has its perks.  Lots of fresh air, beautiful natural landscapes and loads of hiking, kayaking, and even snowshoeing just outside.  One unexpected aspect of living in the great northwest is the lack of Vitamin D in the winter.  Due to our northern location and distance from the equator, our winter sun does not provide adequate (or any) amounts of Vitamin D.  That is, when the sun decides to peek out from behind the clouds and grace the good people of Washington with its golden bounty. 
 
Around August summer has shed its last glorious rays of sunshine and by November and December I start to feel the need for more nourishment.  Good old, grown from the earth and filling my every cell kind of nourishment. That's when it's green smoothies for breakfast, spirulina shots and salad for lunch and warming, hearty soups for dinner.  Life is looking pretty tasty!  Today I'm sharing with you my PNW secret: Eat Your Sunshine!!  When there is no sun outside just whip up sun grown yumminess for your insides!  Eating brightly colored fruits and vegetables like peppers, lettuce, squash, and tomato will transfer liquid sunshine in the form of phytonutrients right to your body. Eating them fully raw will ensure you get the highest amount of nutrient possible from what you're eating.  Make winter salads your new go to dish to keep that vegan glow all year round.
 
Today, I found myself with some leftover black beans that I had made the day before. Wanting something fresh but filling on this cold (and snowing soon, I hope!) day, I decided to make this beautiful salad that was so delicious it has made it to the blog.  My ingredient list for the salad is really just a rough guideline, use what you have on hand or what ingredients you love the most. Try shredded cabbage, corn, mushrooms, asparagus, cucumber, zuchinni, or anything you have.  The beauty of this salad is not only the color, so add lots of variety, it is the incredibly versatile dressing that will pair well with most vegetables.  I hope you guys love it as much as I did!  Here we go:
 
Mexican Chop Salad with Cilantro Vinaigrette
Makes 2 salads
Ingredients:
4 cups romaine, chopped
3 sweet peppers, seeded, julienned
1 tomato, seeded, diced
1 carrot, julienned
1 soft yellow squash, diced
1/2 cup black beans, cooled
pinch of vegan cheddar shreds, optional
 
Dressing:
1/4 cups fresh cilantro, chopped
1 garlic clove, chopped
2 Tbsp. grapeseed oil
juice of 1/2 to 1 lemon
1/4 tsp. cayenne
1/4 tsp. cumin
pinch of sea salt
 
 
Add all of your salad ingredients to a large bowl and toss.  For the dressing, add all ingredients to a blend and blend until it is creamy and well blended.  Dress and toss the salad.  Enjoy!
 
Now before you guys start thinking that Washington skies are always grey, don't forget the power of a glorious sunrise.  Even through the clouds :)


Saturday, November 30, 2013

Raw Chocolate Truffles


When I found out that my hot yoga class was offering a special class Thanksgiving morning, I knew I had to bring a treat!  Since it was in the a.m. and since we were a large group of people, I knew that my raw, vegan Chocolate Truffles would be a hit!  Bite-sized and healthy enough to enjoy in the morning, I decided a big batch was just what was needed.  Everyone loved them and thankfully I made enough for my yoga teacher to take home to her three boy! 
These truffles are incredibly easy to make and are guaranteed to please.  They would make a lovely addition to any holiday table, party, or just a great treat anytime!  Here is what you're going to need:
  • 2 cups raw nuts (I usually always use raw almonds but cashews, pecan, or walnuts would work)
  • 3/4 cup raw cacao powder
  • 1 cup dates, pitted (medjool are a good choice but today I opted for golden)
  • 3-4 Tablespoons filtered water
  • 2-3 Tablespoons maple syrup (optional for added sweetness)
  • 1/2 teaspoon vanilla extract (optional for added sweetness)
  • Pinch of Himalayan or Sea Salt
  • 1 to 1 1/2 cups shredded, dried coconut (for decoration, option to also use raw cacao nibs, sesame seeds, chopped nuts, and raw cacao powder mixed with cinnamon).


Method:
  1. Into a food processor fitted with the "S-type" blade, add your nuts.  If you want little pieces of nuts in your truffles, then process nuts until they are in tiny pieces.  If you want a smoother truffle, process nuts to a fine powder.
  2. Add cacao powder and salt then process briefly to combine.
  3. Add the remaining ingredients and process until the mixture begins to form a giant ball.  The dates are nice and sticky so they will encourage the ingredients to form together.  This should happen pretty quickly.  Test your dough by pushing some between your finger and if it sticks together then it is good to go.
  4. Roll the truffle mixture into small 1 inch balls. 
  5. Take coconut and place on a plate (option to also use more cacao powder or sesame seeds to roll your truffles in for variety).
  6. Roll each ball in the coconut so that is covered like a little ball of snow.
  7. Enjoy!

Here is the plate I brought to my yoga class!  Literally took just 30 minutes to make :)
Happy Holidays!!


Friday, November 22, 2013

Butternut Squash Tamales


If you love butternut squash and have made it into soups, curries, ravioli, roasted it, mashed, it, stir fried it and even juiced it then you might be looking for a new way to incorporate this delicious winter vegetable.  Then this is the recipe for you!  These Butternut Squash Tamales are savory and delicious but they do require a bit of time to prepare.  My suggestion would be to make the dough and the filling on one day, then stuff the tamales and cook them the next day.  Of course, making them in one day is possible but it will take around 3 hours from start to finish.  Tamales are a process well worth the time, not to mention they make the kitchen smell like limes and tortillas!  I've included a recipe for homemade chipotle hot sauce since I was not able to find chile in adobo sauce that was not being sold in an aluminum can (boo hoo on BPA leaking and possible future aluminum induced Alzheimer's disease.) So, I made my own for the first time and couldn't believe how easy it was!  Let's get started...

Here's what you're going to need:
  • 16 corn husks
For the dough
  • 2 cups butternut squash, diced
  • 3 1/4 cups vegetable broth
  • 6 chives, chopped (white and green)
  • 1 Tbsp. Chipotle en Adobo sauce
  • 1 3/4 cup masa harina (Bob's Red Mill is a good non GMO brand)
  • 2 Tbsp. evoo
  • 2 cloves garlic, minced
  • 1-2 tsp.  sea salt
  • 1 tsp. ground cumin
For the filling
  • 1 small bunch chives, finely chopped (white and green)
  • 4 cloves of garlic, minced
  • 2 Tbsp. Chiptole in Adobo sauce (or more if you want to turn up the heat)
  • 1 tsp. ground cumin
  • 1 tsp. coriander
  • 1-2 tsp. sea salt
  • 1/2 cup golden raisins
  • 1 cup vegetable broth
  • 1 1/2 tsp. orange zest
  • 2 Tbsp. evoo
Method for the Dough:

  1. Into a medium sized stock pot, add the butternut squash, spring onion, adobo sauce, garlic, salt, cumin, and the vegetable broth.  Bring to simmer over medium-low heat, cover and cook about 15 minutes or until the squash is tender and mashable.
  2. Turn off the heat and grab a slotted spoon.  Carefully remove the cooked squash and place in a bowl.  We will be using the broth so cover it back up and set aside.
  3. Into a large mixing bowl, place half of your cooked butternut squash. Mash the squash with a fork and then mix in the masa harina (1 3/4 cups).
  4. Take the lid off of your stock pot and slowly pour the broth over the masa mixture.  Mix with a fork until the mixture is smooth and creamy.  Stir in the olive oil and then cover with plastic wrap and set aside.  If it seems too dry, add a little bit more oil maybe 1 to 2 tbsp. extra.
Method for the Filling:
  1. In a large skillet, heat your 2 Tbsp. of olive oil over medium heat.  Add the garlic, chives, cumin, coriander, and salt cooking until just tender or for about 1 minute.  Add the reserved butternut squash, golden raisins, chipotle sauce, and stir together gently.
  2. Add the vegetable stock and orange zest to the pan stirring occasionally until the liquid has been moderately absorbed or for about 2 to 3 minutes.  Remove from heat and place the filling into a bowl.
Method for Tamales:
  1. Soak the corn husks in warm water for 20 to 30 minutes to soften.  Remove from water and set on a plate for easy assembling (see assembly pictures below).
  2. With the dough and filling within reach, begin to assemble your tamales.  Take one husk and lay it flat on the cutting board open side up, horizontal to you with the bottom of the husk to your left (if you are right handed).  Take 2 to 3 Tbsp. of dough and press it onto the husk in a rectangular shape.  Keep the dough even and press until it is about 1/4' thick.
  3. Spoon a little bit of the filling in a line onto the center of your dough.
  4. Take the edge of your corn husk that is farthest from you and gently fold it toward you.  This will bring the dough over the filling and is forming your tamale.  Gently pull back the husk leaving your tamale on one half of the husk.  Press in any edges that are protruding and make it look pretty if it's a bit sloppy.  Then fold up your tamale by placing the husk back over and folding up the bottom.  There will be an open end.  You can leave this open and when the tamales are steamed, stand up the tamales open side up.  Another option is to tie off the open end with a piece of husk and then steam the tamales on their sides.
  5. Steam your tamales for 30 to 50 minutes.  If you plan to freeze any, steam them first, allow to cool completely then pack for the freezer to reheat anytime.


I served my tamales with a kale quinoa salad, pineapple and some homemade black beans for a complete meal.  Of course, you could also served with Mexican rice and churros for a full dinner!  I hope you enjoy making these tamales and remember to be patient with them, it is a process that gets easier and quicker with practice. Enjoy!

Wednesday, October 30, 2013

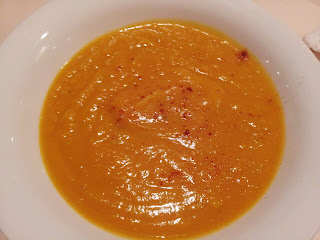
Pumpkin Cheese Soup


This year, Fall has been particularly spectacular! Not only has the landscape far surpassed my expectations in terms of color, falling leaves, and sunny days BUT my garden has provided a bounty of pumpkins and squash!  More than I could have ever imagined!  In tribute to my blossoming green thumb and to the chilly temperatures outside (c'mon Washington it's only October, are you really going to be 41 degrees outside!) today we are talking festive and we are talking soup! 
 
Soup is one of the easiest and one of my favorite dishes to make.  Soup can be thrown together with very few ingredients and will warm the body and delight the taste buds. Don't let being vegan make you think you can't have your potato cheese, corn chowder and pumpkin cheese soups!  Using vegan shredded cheese like Daiya,  a vegan non flavored creamer, or blended white beans with nutritional yeast are tools of the vegan trade when it comes to creamy and/or cheesy soups.  For this soup, I have opted to use beans and nutritional yeast with a little bit of miso paste.  If you are living soy free or just don't like soy, opt for chickpea miso.  If using a soy based miso paste, look for organic and verified non gmo on the label. 

First, a slight detour into my photo world of Fall...
This past weekend a friend from LA came to visit our little island so we took her to one of the many seaside parks here on Bainbridge Island.  The sun was out in all its glory (rare for Western Washington) and we were very lucky to have had Fall in full swing with all its beauty.
 
We saw a banjo player making folk music as the sun was setting over the water...
Who doesn't love a good live music show on the weekends.  This guy was nice enough to hold his position long enough for me to grab a quick pic :).
 
If you ever visit Seattle make sure to visit the Space Needle.  I've been here for about a year and a half and we finally made it to the famous landmark.  It was cloudy when we walked out onto the observation deck so we couldn't see Mt. Rainier but the view and experience were still top notch.
 
My sister Alexis, our friend from LA Emily and yours truly at the Space Needle!
 
Ok, enough with the touristy stuff, lets make some soup!  Are you ready for pumpkin-cheese-festive yumminess?!!  This soup is as delicious as it is easy, make extra because it will go fast!
 
 
Pumpkin Cheese Soup
 
Ingredients:
 
1 Tbsp. olive oil
1 cup onion, chopped
1/2 - 1 large sugar pie pumpkin, peeled, seeded, cubed (approx. 4-6 cups)
3 cups vegetable broth
1 can white beans
2 cups almond milk, non flavored
2 Tbsp. miso paste (mellow or white miso)
2/3 cup nutritional yeast (found in bulk isle of your grocery store)
 
 
In a 6-quart stock pot, warm oil over medium heat.  Add the onion and cook for 5 minutes.  Add the pumpkin and broth.  Bring to a boil, reduce to simmer and cover.  Cook for 10 to 15 minutes or until the pumpkin is tender.  Add the white beans, almond milk, miso paste and nutritional yeast.  Allow the soup to cool slightly.  Then add to blender and blend until smooth.  Depending on the size of your blender, you might need to do this in two batches.  If that is the case, pour half the soup into blender and blend.  Place blended soup in a medium sized bowl.  Add remaining soup to blender and blend until smooth.  Replace all the soup to the stock pot and warm over medium low heat for serving.  If  the soup is too thick for your liking, add a little more stock and stir.  To serve, garnish with a dash of paprika or for some heat, a dash of cayenne.  Enjoy!


If you have leftover sugar pie pumpkin and are looking for something to make with it, try my raw pumpkin pie!
 

Thursday, October 17, 2013

Pumpkin Quinoa Stir Fry

Instead of fried rice (which I do love but it's not too healthy) try this delicious and colorful Pumpkin Quinoa Stir Fry!  Loaded with flavor and protein (thank you quinoa for containing ALL essential amino acids) this dish is hearty and will satisfy at the dinner table.  Why not bring the Fall season indoors with this fragrant, beautiful, and quick dish!

Ingredients:
Serves 2
Pumpkin Quinoa Stir Fry:
1 cup tri color quinoa, cooked (plain quinoa works as well)
1/2 cup tempeh, cut in bite-sized cubes
2 cups pumpkin, cubed
1/2 cup red onion, sliced in crescents
4 cups curly green kale, chopped and de-stemmed OR spinach
1 tsp. fresh ginger, minced
1 Tbsp. fresh garlic, crushed, minced
1/4 cup cherry tomatoes
1/2 cup red or yellow bell pepper, chopped
1/4 cup zucchini, cut in quarter moons OR 1/4 cup broccoli florets
2 Tbsp. coconut oil
1 tsp. coriander
Pinch of cayenne
Salt and Pepper to taste
3-4 Tbsp. Tamari or Soy Sauce (organic, non gmo)
Sesame Seeds to garnish (optional)
Cilantro to garnish (optional)


Method:
In a sauté pan, add the coconut oil and bring to medium-high heat.  Add the onions, ginger, and tempeh and add 2 Tbsp. tamari.  Stir occassionaly and cook for 3-5 minutes or until onions begin to soften.  Add pumpkin, bell pepper, zucchini or broccoli, and kale or spinach.  Cook for about 10 minutes, stir occasionally.  Add the spices, the cooked quinoa, the rest of the tamari and the cherry tomatoes.  Cook for two minutes and then lower to medium-low heat.  Cook for additional 5 minutes or until kale is wilted.

To plate:
Scoop into bowl, garnish with sesame seeds, cilantro, and sriracha!  Enjoy!
Craving some dessert?  Why not try my Raw Pumpkin Pie with Coconut Frosting?
I hope you enjoy these recipes! Thank you for stopping by!


Pumpkin Seed Butter


Nut and seed butters are very nutrient dense and incredibly easy to make at home.  At the store, raw nut and seed butters will run you around 8 to 10 dollars for a small jar.  If you have about a half hour, you can make your own at home and have some fun at the same time!  Fall is in full swing and that means PUMPKIN BUTTER!! Yay, ok it's butter makin' time:

To obtain seeds.  Take a sugar pie pumpkin and cut it in half.  Scoop out seeds.  Place in a fine mesh strainer and rinse well.  Make sure all the little stringy pieces of pumpkin are removed.  Place on paper towel and let dry.


Ingredients:
Raw Pumpkin Seeds (from a Sugar Pie Pumpkin)
1 Tbsp. coconut oil

Method:
Place in food processor and process for about 10 to 15 minutes or until you have butter.  Stop occasionally to scrape down the sides.  Will store for about a week in the refrigerator. 

"What to do with pumpkin butter," you ask?  Well, other than loving it for the zinc and iron it delivers to your body, try making my Raw Pumpkin Pie with Coconut Frosting!
Happy Fall from my home to yours!! Thank you for stopping by!!!

Raw Pumpkin Pie with Coconut Whipped Cream

Happy October!!! I just love Fall and the changing of the seasons, an ushering in of brilliant oranges, yellows, and reds annnnnd I love pumpkins! Carve them, decorate with them, eat them, and save their seeds for next year!  Pumpkins are versatile and for centuries cooks around the world have been mashing, baking, sugaring, and roasting pumpkins.  Today we will uncook our pumpkin! Did you know that Sugar Pie Pumpkins and their seeds can be consumed raw?  The flesh is naturally very soft (unlike other squashes) and is very easy to blend up.  We will be using this variety of pumpkin for our dessert and they can be found in the produce isle of the grocery store.  I would not recommend buying them at a pumpkin patch :).  If you have a green thumb, pumpkins are very easy to grow, actually all squash is easy to grow and you will get boat loads of squash per plant!  My little pumpkin came from my garden harvest today:

If there is anything else that gets me thinking about Halloween, other than bright orange pumpkins in the garden and tall whispy corn stalks, is black cats!  Here is my living Halloween decoration!!
Enough about Halloween, let's talk pie.  This pie is creamy, rich, and very much like it's baked version.  However, this masterpiece is fully Raw and fully ALIVE.  Loaded with enzymes, minerals like zinc, and iron this so called indulgence will give you energy, glowing skin, and a mighty fine dose of nutrients.  Since we are using raw coconut nectar (found in either the health food isle or next to the honey at the store) this is a low glycemic dessert!! Yay!! Here we go, one awesome festive pie coming up:

Ingredients:

Chocolate Cashew Cookie Crust:   (or try my basic No Bake Choclate Pie Crust)
1 cup cashew flour (put raw cashews in food processor and process until you have a fine flour)
3/4 cup oat flour (grind raw oats in a spice grinder until you have a fine powder)
1/4 cup raw cacao powder
1/2 tsp. blue green algae (optional but you won't be able to taste it)
1/4 tsp. sea salt
1/4 cup maple syrup
1/2 cup Creamy Chocolate Frosting

Coconut Whipped Cream (1/2 vanilla, 1/2 chocolate):
Flesh of two young coconuts (how to open a coconut)
3 dates, pitted, chopped OR 1/4 cup raw coconut nectar OR 3 Tbsp. maple syrup
1/4 cup raw cashews (soaked 4 hours)
1 Tbsp. vanilla extract
1/4 cup coconut water
1/4 cup raw cacao powder

Pumpkin Filling:
1 cup raw cashews, soaked 8 hours, rinsed
1/4 cup raw pumpkin seed butter
1 to 1 1/2 cups raw sugar pie pumpkin (skin removed, seeds removed, cubed)
3/4 cup almond milk
1/2 cup raw coconut nectar OR maple syrup
1 tsp. vanilla extract
1/4 cup coconut oil, liquid (place jar of coconut oil in a sauce pan with water in it, warm on stove)
2 tsp. cinnamon
dash of nutmeg

Pie Crust Method:
Add all dry ingredients to food processor.  Pulse to mix.  With the processor running, slowly add maple syrup and process until a dough forms.  Place dough in bowl.  Gently fold in creamy chocolate frosting.  Take a standard pie pan and line with plastic wrap (this will allow you to lift the pie out easily when ready to eat). Gently press the dough into the pan to form a crust.  Place in freezer overnight to harden.

Coconut Whipped Cream Method:
Add all ingredients EXCEPT cacao to a high speed blender.  Blend until creamy.  Remove half of the whipped cream and place in a bowl in the refrigerator to firm up a bit.  To the other half, add the raw cacao and blend.  Place in bowl and allow to cool before adding to your piping bag.  It will hold shape better for frosting when it is cool.

Pumpkin Filling Method:
Add cashews and pumpkin to food processor.  Process until smooth.  Add remaining ingredients and process until smooth and creamy.  Pour filling into prepared pie crust.  Let chill in refrigerator overnight before adding the frosting. 

Decorating Method:
I used a piping bag with two different tips but if you do not have this, take a plastic bag and cut a tiny bit off one of the lower corners.  Put whipped cream in the bag and use as piping.  Another option is to place a small dollop of the whipped cream with a spoon on each slice before serving.  If this is your option, allow the whipped cream to warm and soften for about 15 minutes after removing from refrigerator before spooning it up.

To Plate: A slice, a dash of cinnamon and maybe a little chocolate or vanilla vegan ice cream :)


Enjoy and Happy Fall!!! Thank you for stopping by!!


Pumpkin Curry with Sweet Potato and Sprouted Chickpea


Curry is one of the most simple and delicious foods on the planet.  Thai food rocks my world but a lot of it is fried and fatty.  Curry can easily be healthy without compromising on flavor or satisfaction in the least.  It's also a wonderful opportunity to add in new herbs and spices to your culinary life.  Turmeric, ginger, cumin, coriander, chili, lemongrass, and basil are some of the building blocks for traditional Thai curry dishes.  Today, I am sharing a red curry dish made using store bought red curry paste.  Red curry paste is easy to make from scratch but buying a premade jar is perfect for this recipe since preparing a pumpkin can take some time.  Since we are right in the middle of October, one of my favorite months of the year, we are making everything pumpkin!  You will love this pumpkin curry and feel free to swap in or out ingredients.  Curry is very forgiving when it comes to what vegetables are put in.  However, this is a quite a lovely combo and I do suggest you give sprouting a try because it is so easy and the sprouted mung beans and chickpeas really make this dish special.  Here we go, one pumpkin curry coming up!
Pumpkin Curry Ingredients:
1 Tbsp. coconut oil
1 sweet potato, cubed
2 cups pumpkin, cubed (cut in half, remove seeds, cut away outer skin then cut into cubes)
1/2 cup red bell pepper, diced (I used 1/4 red and 1/4 yellow but use what you have)
1/4 cup onion, finely diced
1 to 1 1/2 cups tofu, pressed, cubed
1 tsp. fresh ginger, chopped
1/2 to 1 cup sprouted garbanzo beans
3-4 Tbsp. red curry paste
1 can coconut milk or coconut cream
3 cups vegetable broth
1-3 Tbsp. sriracha (depending on how hot you want it)
1/4 cup mung beans (for garnish)
1/4 cup fresh cilantro, chopped (garnish)
salt and pepper to taste

Method:
1. In a medium/large sauce pan, add the coconut oil and bring to medium heat.  Once the oil is melted, add the onions, sweet potato and ginger.  Give a stir and let cook for about 5 to 7 minutes or until the onions just start to soften and brown.  Stir every minute or so.
2.  Add the broth and bring to boil.  Reduce to simmer and add pumpkin, bell pepper, tofu and sprouted garbanzo. Cover and allow to simmer to 15 minutes. 
3.  In the meantime, add the coconut milk and curry paste to blender.  Blend until well incorporated.
4.  Add red curry coconut milk to soup and stir.  Add in the sriracha and stir well.  Test your sweet potato and pumpkin with a fork to make sure they are soft.  Reduce heat to low for serving.

To Serve:  Take a small bowl/dish and add cooked quinoa to the bowl.  Pack it in well.  Take your plate and put it over the bowl.  Then flip.  Lift the bowl to leave a perfectly molded quinoa on the plate.  Add chopped cilantro and mung beans to garnish the quinoa and add curry to the plate.  Enjoy!

Monday, October 14, 2013

Polenta with Winter Squash and Arugula

 
Seven years ago I found myself looking for some change in my life. I was happy with my life in Los Angeles, working in film and doing my thing.  It just felt like something was missing.  That year, for my birthday my mother gave me "This Crazy Vegan Life," by Christina Pirello and I read it in ONE night! As I vegetarian I always said the same thing, "I could never give up cheese! I love it too much!"  Thanks to the lovely Christina, I learned that I didn't love cheese and cheese certainly didn't love me!  Not only was I addicted to cheese (thanks to the chemical reactions cheese induces in the brain) and not only was it loaded with cancer causing casein, I felt my life would be bland without pizza, lasagna, and all things cheesy!  If you are a regular reader, then you know that this is far from reality.  I felt that something was missing and that something was veganism.  My body and mind were begging to make the final leap from vegetarian to vegan.  From cheese to tofu ricotta lasagna, Daiya, creamy raw parmesan!  Cutting cheese from my life left a giant void.  That's right!  A huge void ready to be filled with deliciousness like this heavenly concoction: Polenta with Winter Squash and Arugula and, of course, it is topped with arugula pesto, caramelized onions, and creamy raw parmesan!  There are a few layers that go into the making of this recipe but each one if not only quick but adds fantastic flavor dimension.  As "Game of Thrones" likes to say, winter is coming and nights are about to get cold.  This dish is perfect for a night at home with the fire roaring and a glass of red.  An episode of "Game of Thrones" would only make it better.  Give this dish to any non vegan and they are guaranteed to love it!  Here we go, one recipe for polenta heaven:
 
Polenta with Winter Squash and Arugula
 
Polenta Ingredients:
1 1/2 cups winter squash, cooked, mashed*
1 cup polenta (from bulk bins not the pre-cooked kind)
2 cups arugula, stems removed**
1 medium onion, diced small
3 cups vegetable broth
3 to 4 Tbsp. olive oil, more if needed
1/2 cup unflavored almond milk
1 tsp. sea salt (optional if your broth is salt free)
1/4 tsp. pepper
 
*You can use any type of winter squash such as butternut, acorn, Japanese pumpkin, etc. To cook the squash, just cut the squash in half.  Remove seeds and outer skin then cut into cubes.  Toss with a little bit of olive oil, salt and pepper and bake at 375°F for 15 minutes.
** If you don't like arugula, check out my recipe for Herbed Polenta with Butternut Squash and Sautéed Veggies.
Arugula Pesto Ingredients:
2 cups arugula, packed, stems removed
1/2 medium or 1 small zucchini, chopped
1/2 cup raw almonds
1 garlic clove, crushed (to release the oils)
1/4 cup olive oil
salt and pepper to taste
 
Caramelized Onions Ingredients:
1 large sweet white onion, sliced thinly in half crescents
 
 
Polenta Method:  In a sauté pan over medium heat, add olive oil and once warm add the onions.  Cook over medium heat until onions soften.  About 5 minutes.  Add the cooked squash and mix well.  Cook for an additional 2 minutes. In a medium sized saucepan, bring 3 cups of broth to boil.  In an even swirling pattern, add the polenta and stir frequently until it becomes creamy.  Add the squash and onion mixture. Stir well.  Add the almond milk.  Keep stirring.  Add the arugula and stir until it is wilted.  Pour into an oven safe dish and allow to cool.  This will allow the polenta to firm up and will make plating very easy and pretty.
 
Arugula Pesto Method:  Add everything but the olive oil to a food processor and process to small pieces.  While the processor is running, add the olive oil.  Process until smooth and creamy.
 
Caramelized Onions Method:  In a medium sauté pan, add enough olive oil to coat the bottom of the pan.  Add the onions once the pan and oil have warmed.  Cook for about 5 minutes on medium heat then turn the heat down to medium-low.  Stir occasionally and cook for about 40 minutes.  Don't rush the caramelizing process and don't stir too often.  Allow the onions to sit on the heat and really develop in flavor.  When you do stir, make sure to scrape the bottom of the pan and reincorporate any caramelising that has stuck.  When the onions are sweet and brown, they are finished.  The picture below is the mid way point (about 20 minutes of cooking).
 

To plate:
Once the polenta has cooled and firmed, pop it into the oven at 350°F for about ten minutes to warm it up.  Remove from oven and set on a heat safe surface.  Take a small bowl and spoon the polenta into the bowl and pack it firmly.  Take your plate and turn it upside over the bowl.  Flip and tap the bottom of the bowl to release the molded polenta.  If the polenta does not release, run a butter knife around the inside rim to loosen it.  Once plated, add a layer of fresh pesto, then a few pieces of arugula, some caramelized onions, a dollop of raw parmesan and a few chives.  There you have it!  Heavenly polenta on plate!  Enjoy and remember that we made enough for seconds :)


Sunday, October 6, 2013

Butternut Squash Red Curry Soup

 
Hands down this my favorite soup of all time!  Butternut squash is divine and this one is extra special since it was grown by yours truly!  Easy to make, warming, filling, and incredibly delicious this Butternut Squash Red Curry Soup will soon become your favorite as well!


Butternut Squash Red Curry Soup
Serves 4

Ingredients
1 Tbsp. olive oil
1 cup white onion, chopped
1 Butternut Squash about 4 pounds, seeded, peeled, and cubed
1 large apple, peeled, diced
3 cups vegetable broth
1 can coconut milk
4 Tbsp. red curry paste
Salt and Pepper to taste
Cilantro, chopped, for garnish (optional)

Method:
In a large stock pot, heat oil over medium heat.  Add the onion and cook for about 5 minutes.  Add the apple and cook for an additional 5 minutes.  Add the squash and stir.  Then add the broth, stir again, and bring to a boil.  Reduce to a simmer, cover, and cook for about 15 to 20 minutes or until your vegetables are fork tender.
In a small bowl, add the coconut milk and curry paste.  Whisk until well blended.  Set aside.
Mash your soup to desired consistency using a fork or potato masher.  I like mine with a few chunks so I use a fork.  For a smooth soup, allow to cool then blend soup in a blender and return to heat.
Add your curry coconut milk and stir.  Bring to medium heat for serving.  Add salt and pepper to taste.  To serve, garnish with a swirl of coconut milk and chopped cilantro.  This soups pairs extremely well with my Thai Fresh Rolls and Spicy Peanut Dipping Sauce for a complete meal!  Enjoy!
 
It is the season for squash, harvest, and pumpkins! Have you guys visited the local pumpkin patch yet for your festive goodies?  On the island, we have a wonderful farm called Day Road Farm that produces the most beautiful organic pumpkins, corn, and scarecrows!  Happy hunting and I hope everyone is enjoying Fall!